Contents
Introduction:
CapCut is a versatile and easy-to-use video editing app that has gained popularity for its intuitive features and creative potential. One of the most powerful aspects of CapCut is the ability to create and use templates. These templates allow you to quickly apply pre-designed elements like transitions, effects, and text to multiple videos, saving time and ensuring consistency. In this blog post, we’ll walk you through the process of creating your own CapCut template from scratch, without any copyright concerns, so you can share it freely or use it for your personal projects. we also provided Capcut Pro unlock free premium.
What is a CapCut Template?
A CapCut template is essentially a pre-configured video project that includes a combination of effects, transitions, music, and text. Instead of starting each video from scratch, you can apply a template to streamline your editing process. Templates are especially useful for creating consistent content, such as social media posts, event highlights, or themed videos.
What is a CapCut Template?
Creating your own CapCut template offers several benefits:
- Efficiency: Reuse the same design elements across multiple videos, saving time and effort.
- Consistency: Ensure a uniform look and feel in your content, which is important for personal branding or thematic projects.
- Customization: Tailor the template to your exact needs, making it easier to produce videos that match your creative vision.
- Freedom from Copyright Concerns: By creating your own template, you can avoid using copyrighted material and instead focus on original content.
Step-by-Step Guide to Creating a CapCut Template
Step 1: Plan Your Template
Start by planning the purpose and style of your template. Consider these factors:
- Purpose: What kind of videos will you be making with this template? (e.g., social media clips, tutorials, celebration videos)
- Style: What aesthetic are you aiming for? (e.g., modern, minimalistic, vibrant)
- Elements: Decide on key features like transitions, text styles, and effects.
A clear plan will guide your creation process and ensure your template meets your needs.
Step 2: Start a New Project in CapCut

Open CapCut and tap on “New Project” to begin. You’ll start with a blank canvas where you can import media, add effects, and design your template. Use placeholder images or videos as stand-ins for the content you’ll replace later.
Step 3: Add Transitions and Effects

Transitions and effects are crucial for giving your template a polished look. To add a transition:
- Tap on the “+” sign between two clips.
- Choose a transition from the available options.
- Adjust the duration and other settings to fit your template’s style.
For effects, tap on the “Effects” tab and apply filters, overlays, or motion effects to your clips. Experiment with different combinations until you achieve the desired look.
Step 4: Customize Text and Titles
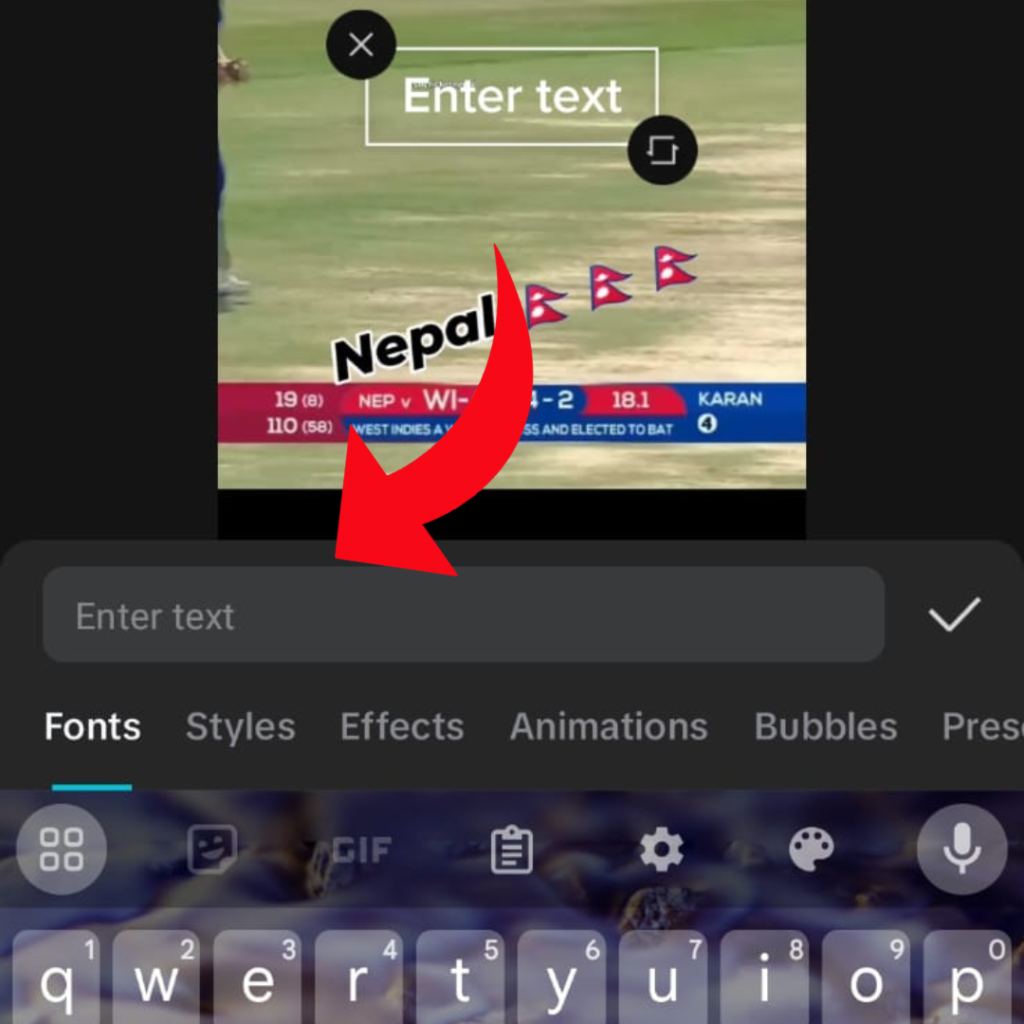
Text elements, like titles and captions, are essential for conveying information in your video. Here’s how to add and customize text in your template:
- Tap on the “Text” tab.
- Select the type of text (e.g., Title, Subtitle, Body Text).
- Customize the font, color, animation, and position.
These text elements will serve as placeholders, which can be easily edited when the template is reused.
Step 5: Choose and Sync Background Music
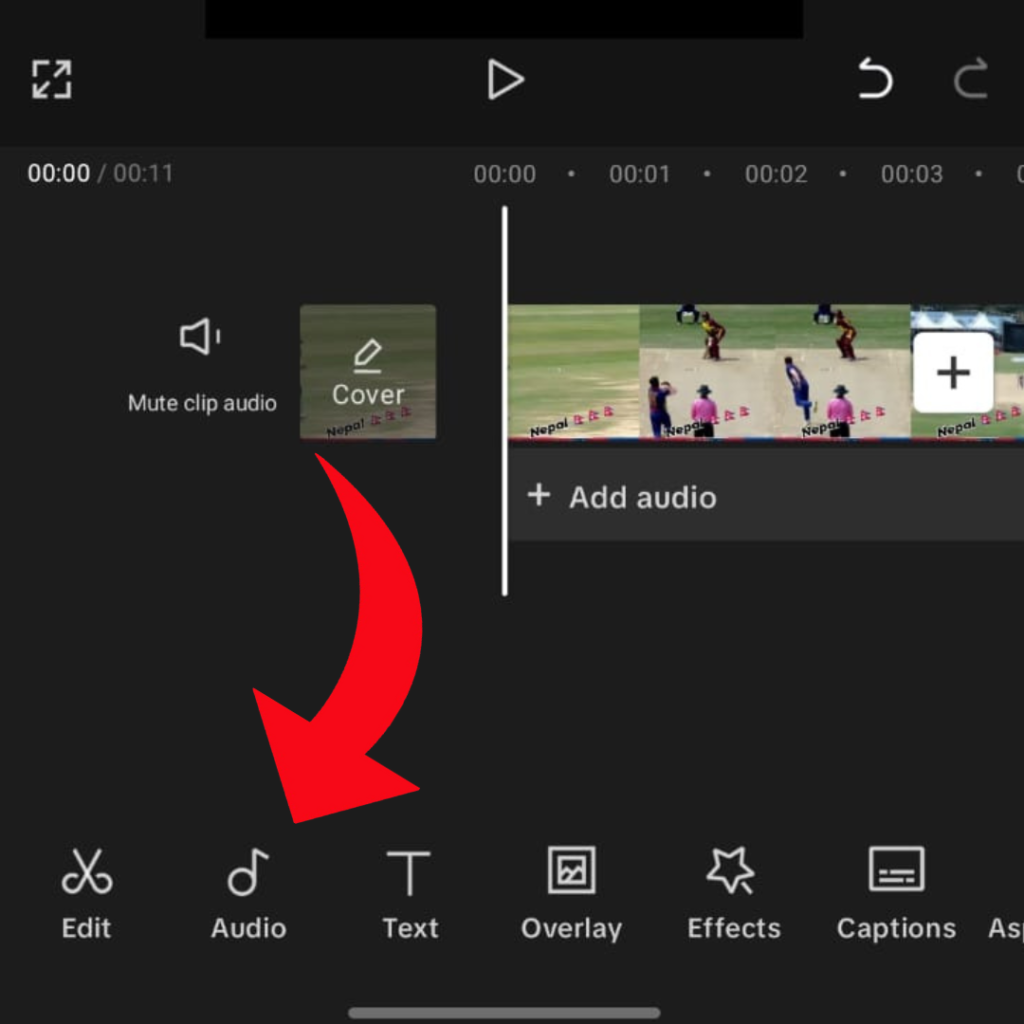
Music plays a key role in setting the tone of your video. Since we’re avoiding copyright concerns, choose from CapCut’s library of royalty-free music or upload your own original tracks. To add music:
- Tap on the “Audio” tab.
- Browse available tracks or import your own.
- Sync the music with your video, adjusting the start and end points as necessary.
If you’re using a track that you’ve created or have permission to use, ensure it fits well with the visual elements of your template.
Step 6: Fine-Tune Your Template
After adding all the elements, take some time to review your template. Check the following:
- Timing: Ensure transitions, effects, and music are well-timed and flow smoothly.
- Consistency: Make sure the style is uniform throughout the template.
- Ease of Use: Consider how easy it will be for others to replace the placeholder content with their own.
Step 7: Save and Export Your Template
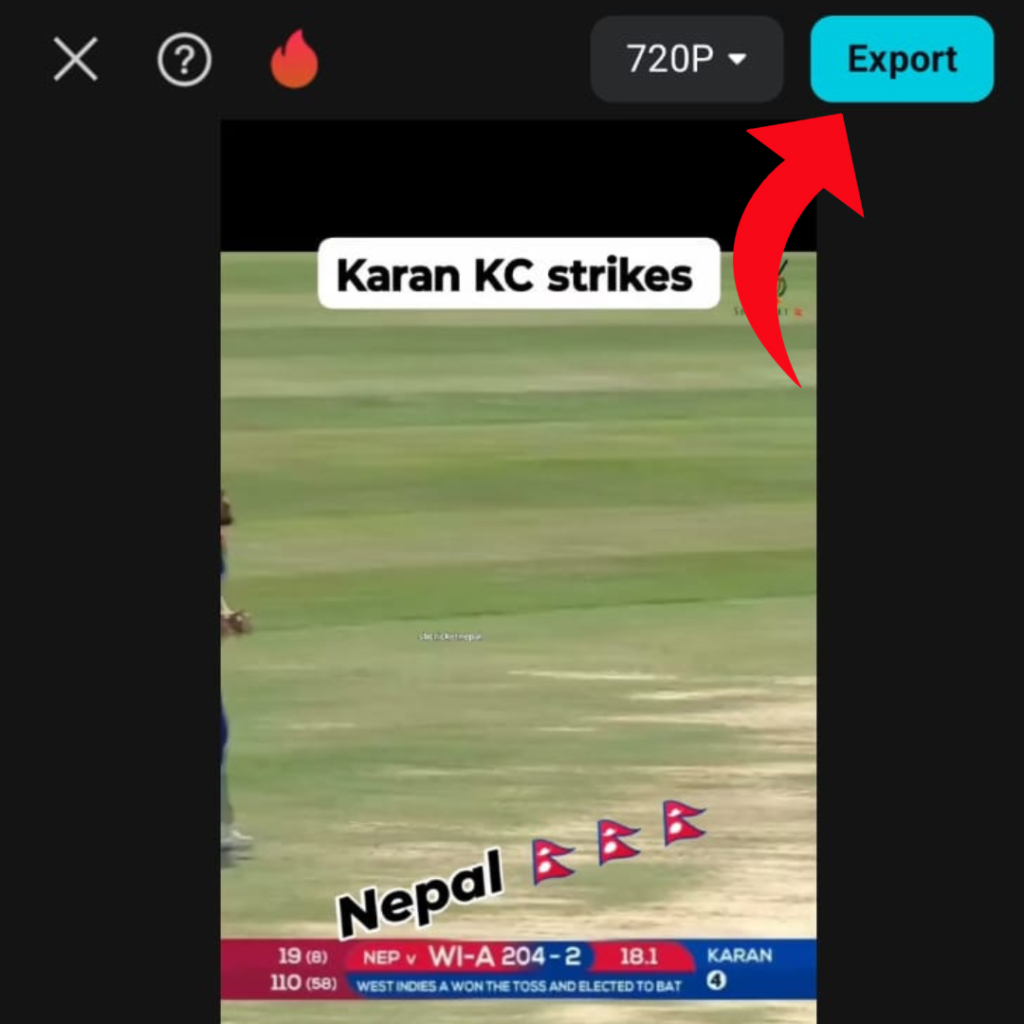
Once your template is complete, save it as a project in CapCut. Give it a clear name so you can easily find it later. If you want to share your template, export the project and provide clear instructions on how to replace the placeholder content.
Step 8: Share Your Template
If you think others might benefit from your template, consider sharing it on social media, in online communities, or with friends. You can also create a tutorial video explaining how to use the template, which will help others and showcase your creative work.
Tips for Creating a Successful CapCut Template
- Keep It Simple: A clean, straightforward design is easier to customize and appeals to a wider audience.
- Test Your Template: Replace the placeholder content with actual media to ensure everything works smoothly.
- Stay Original: Use original content and avoid copyrighted material to keep your template free from legal issues.
Conclusion:
Creating your own CapCut template is a great way to streamline your video editing process, maintain consistency in your content, and share your creativity with others. By following this guide, you’ll be able to design a template that is both functional and visually appealing—all without any copyright concerns. Whether you’re a content creator, a social media enthusiast, or just someone who loves making videos, a well-crafted CapCut template can elevate your projects. Start creating today and see where your creativity takes you.